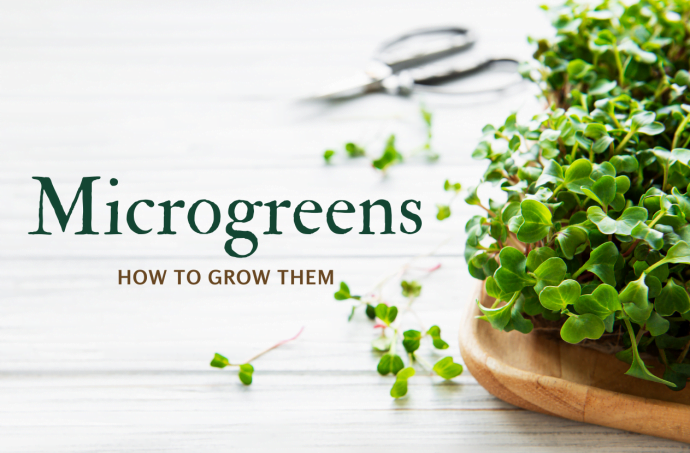
Microgreens: how to choose and grow them
You’ve probably seen microgreens in various recipes as a decorative touch. And it’s true. Microgreens do add a touch of colour and finesse to dishes. But these little herbs are much more than a decoration.
They not only add colour and freshness to many kinds of recipes but also enrich them with vitamins and minerals. So their name refers only to their size because, in truth, these little herbs are a superfood because of their nutritional properties.
At Arctic Gardens, we’ve done our research so you can learn all about microgreens, their benefits and how to include them in your recipes for a fresh twist.
So what are microgreens anyway?
To understand what microgreens are, you need to know the difference between them and sprouts. And they’re not the same thing.
Germination is the first stage of plant life. This process occurs when the seed is just beginning to wake up and the leaves haven’t come out yet. The growth period varies between 2 and 7 days.
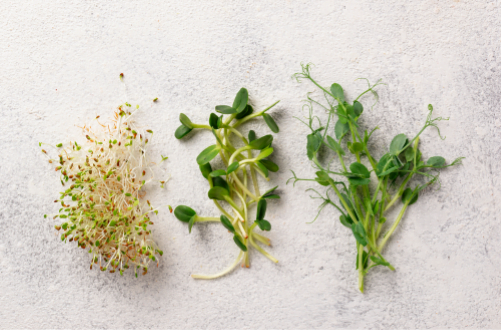
Sprouting stages
On the other hand, microgreens appear if you wait a few more days after the seeds have germinated. The growth period varies between 7 and 21 days.
At the time of harvest, they already have small leaves and they’re anywhere between 1 and 3 inches (2.5 cm and 7.5 cm).
These are small concentrates of vegetables and herbs, rich in vitamins and minerals. Microgreens are also characterized by a more intense, crisp and fresh taste than sprouts.
Why microgreens are good for you
These little veggies have big health benefits:
Nutritional value
One of the great things about microgreens is their nutritional value. Because they grow quickly, nutrients are much more concentrated.
Did you know
Studies have shown that some microgreens can contain up to 40 times the amount of nutrients normally found in a mature vegetable.
Due to the large amount of nutrients concentrated in these small plants, they’re currently considered the new superfoods.
For your health
Because of their high concentration of antioxidants, these plants are also an excellent choice for delaying cell oxidation (responsible for cell aging).
In fact, they can also help prevent lung, colon, prostate and breast cancer.
But that’s not all. Microgreens are also your allies in the prevention of cardiovascular disease and neurodegenerative diseases.
As if that weren’t enough, microgreens will help you maintain a low-calorie diet: a handful contains less than 10 calories but is rich in fibre and plant protein. So if you suffer from slow digestion, don’t hesitate to include microgreens in your diet.
Also, remember to consult your doctor for proper nutritional advice for your health.
Tip
To get the most out of the vitamins, cut and eat the microgreens within 2 days of picking.
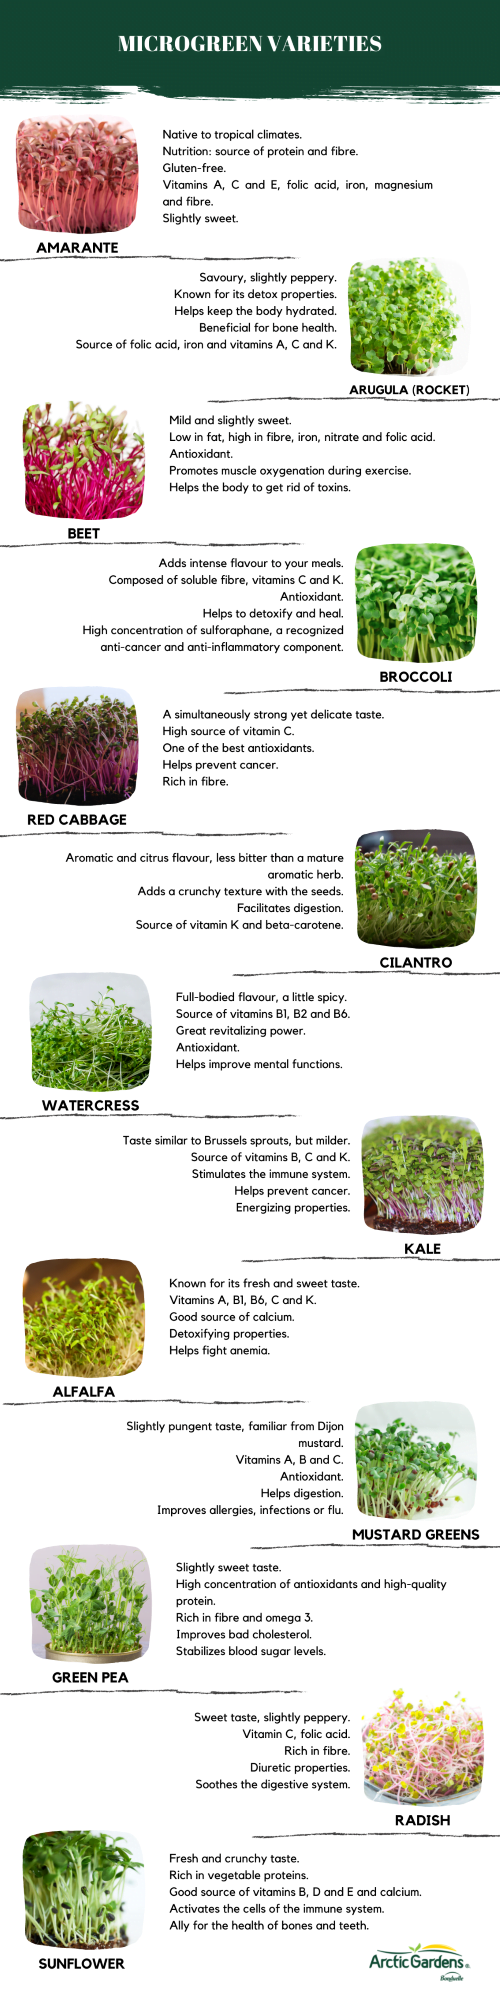
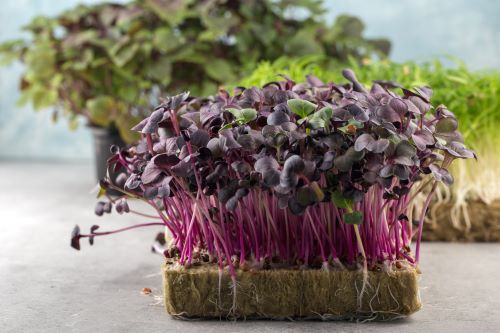
Microgreen varieties
On the market, you can find lots of varieties. Here we explain some of the most popular.
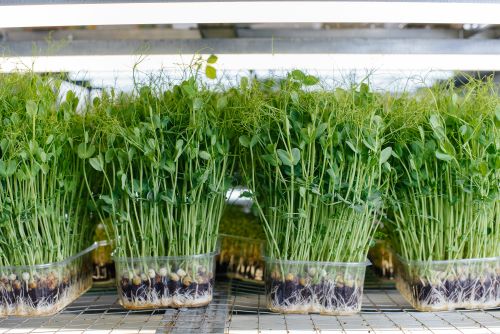
How to grow microgreens at home
Incorporating microgreens into your diet is simple as they’re easy to find on the market and convenient to grow (they don’t need much space). So they’re perfect for the urban garden.
Normally, you can find the seeds in supermarkets in bulk or even in urban farms where you can find a wide variety.
We’ll explain the growing methods so they’re as close as possible (AKA convenient) to add to your meals.
Growing microgreens on potting soil
To grow microgreens with potting soil, you’ll need the following materials:
- Shallow seed tray (3 to 10 cm)
- Organic potting soil
- Compost (if the potting soil doesn’t contain it)
- Microgreen seeds
- Empty tray for covering the tray with seeds
- Spray bottle
- Optional: a light source, in addition to the sun
Once you have all the materials, you can grow your microgreens by following the steps below:

- Prepare the potting soil so that it’s slightly damp and add compost if necessary.
- Fill your tray with potting soil. Be sure not to compact the soil.
- Spread the seeds over the entire tray (1 tsp to 1 tbsp depending on the size of the seeds).
- Once the seeds have been distributed, cover them with a thin layer of soil and pressing down on them a little.
- Spray with water and put an empty tray on top of the tray with the seeds to create a kind of greenhouse for the seeds.
- Once the seeds sprout their first leaves, they’re ready for sun. So you can remove the top tray and place them near a sunny window.
- Spray the shoots regularly with water, but be sure not to soak the soil to avoid mould.
- When your microgreens are as tall as you want, cut them farther from the soil than the hemp leaf. And there you have it! Add them to any meal. The microgreens will be ready to eat after 7 to 21 days depending on the variety.
Tip
If you’re growing several microgreens at the same time, put the large seeds under the soil (sunflower, peas, coriander) and the small seeds (e.g. radish) above the soil. This way, your microgreens will grow evenly to form a beautiful green carpet.
How to grow microgreens on Terrafibre hemp sheets
To get your microgreen production off to a good start, you’ll need the following:
- Shallow seed tray (3 to 10 cm)
- Terrafibre hemp sheet
- Microgreen seeds
- Empty tray for covering the tray with seeds
- Spray bottle
- Optional: a light source, in addition to the sun
Once you have all the materials, you can grow your microgreens by following the steps below:
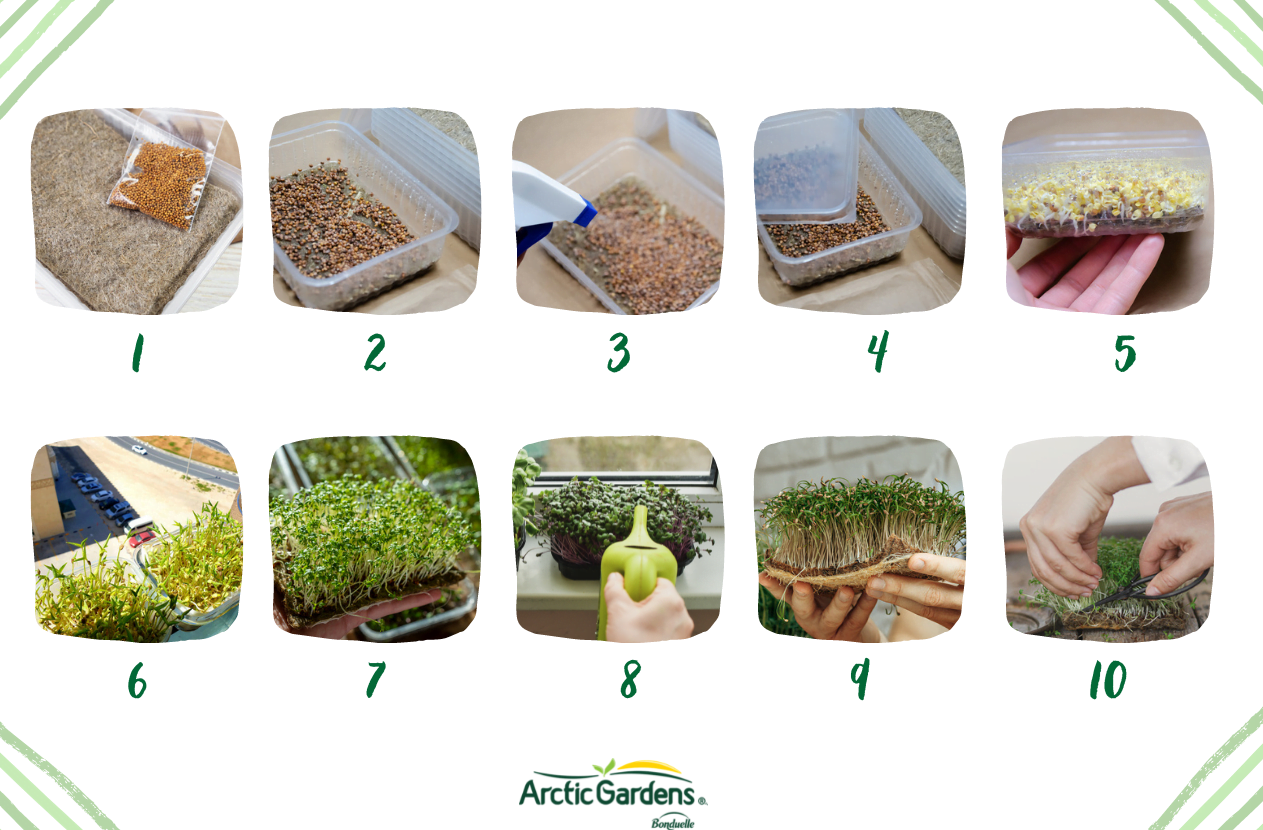
- Place the hemp leaf on the tray and spray to moisten.
- Spread the seeds over the entire tray (1 tsp to 1 tbsp depending on the size of the seeds).
- Spray with water to keep the seeds moist.
- Put an empty tray on top of the tray with the seeds to create a kind of greenhouse for the seeds.
- Leave the seeds covered until each shoot has its first small leaves.
- Once the seeds sprout their first leaves, they’re ready for sun. So you can remove the top tray and place them near a sunny window.
- After 4 to 6 hours in the sun, the leaves will turn green (this is the chlorophyll).
- Spray with water every day.
- The microgreens will be ready to eat after 7 to 21 days depending on the variety.
- When your microgreens are at the desired height as close to the carpet as possible. And there you have it! Add them to any meal.
Ecological tip
Don’t throw away plastic cake containers. You can use them to cover your microgreens to create a greenhouse effect.
How to store them
When the microgreens are the size you want, but you have more than you can eat, put them in a plastic bag and leave them in the fridge.
The cold will make them go dormant while preserving their freshness. However, don’t leave them in the fridge for more than 2 weeks.
Bonus
The art of preserving vegetables isn’t easy, so here are our best tips for storing veggies even after the summer is over!
How to cook microgreens
The possibilities for incorporating these little veggies into your recipes are endless. You can be sure that your dishes will have a touch of freshness, crunch and colour.
They also allow you to play with flavours. Looking for a touch of sweetness in your meal bowl? No problem, add some beetroot microgreens. Or how about a little spiciness in your salad? Mustard microgreens are ideal.
Here are a few recipe options where you can add microgreens.
In salads or meal bowls
Before adding the microgreens, be sure to read our guide to salads and meal bowls to throw together the perfect recipe!
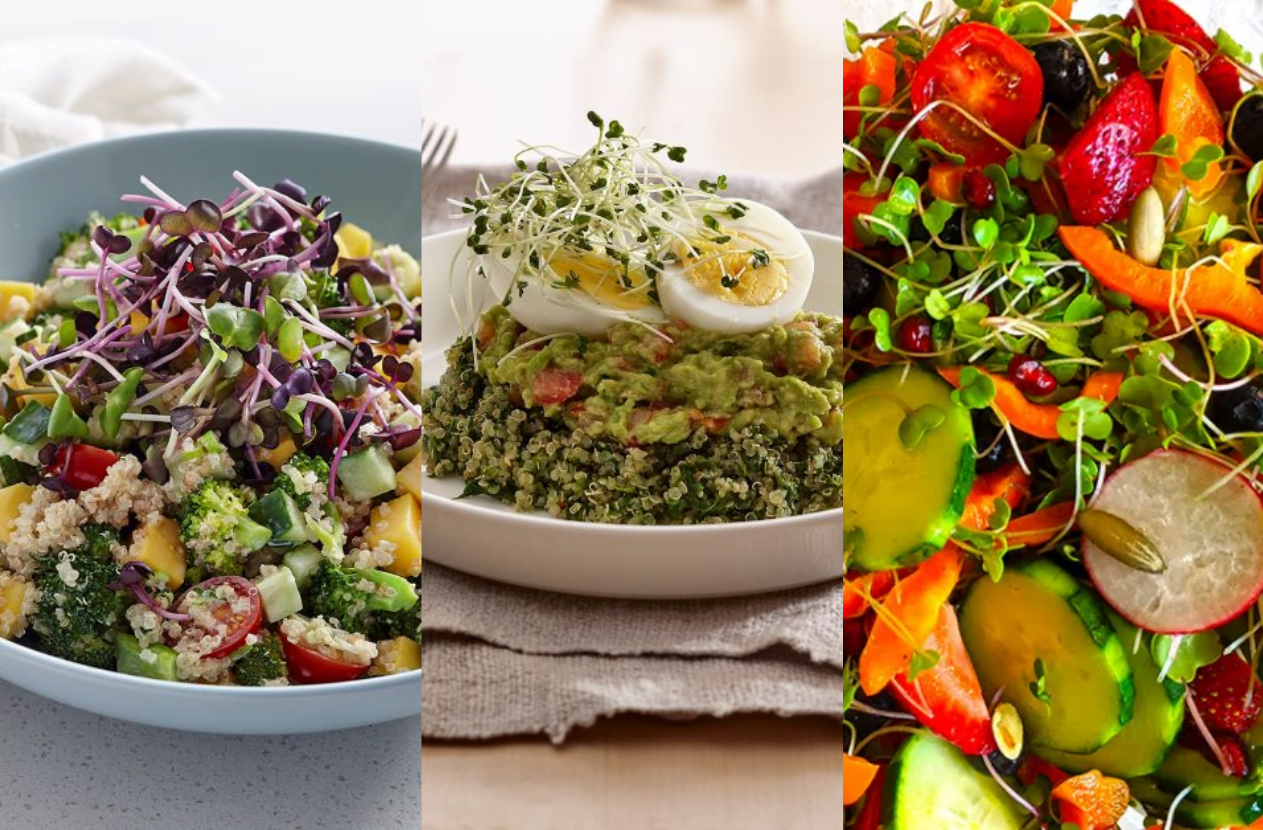
Arctic Gardens | Arctic Gardens | The Plant Palette
In sandwiches, pizzas or burgers

Arctic Gardens | Fork in the Kitchen | Jojotastic
Other interesting options
- Mango Gazpacho
- Microgreens Omelette
- Mini Strawberry Chocolate Tart With Whipped Goat Cheese & Basil Microgreens
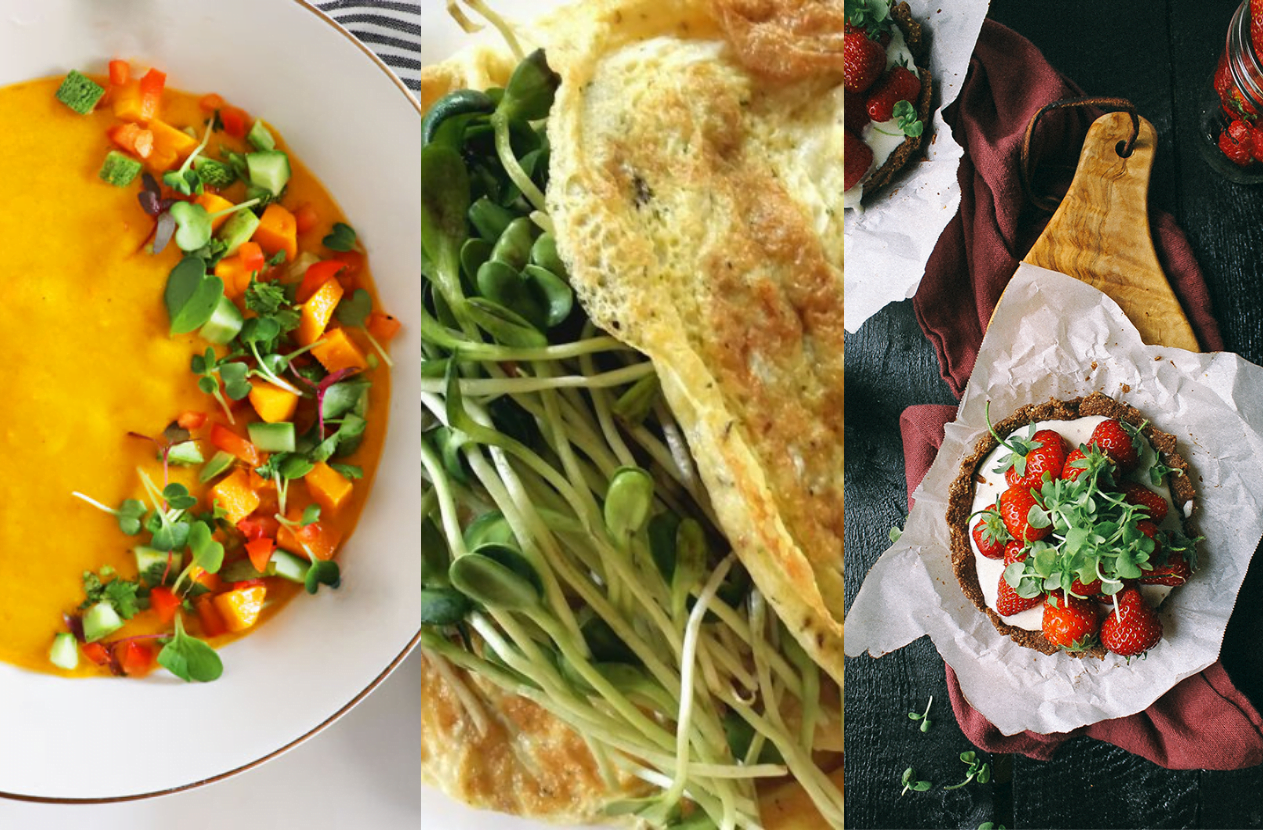
Sprig & Vine | Agatha Achindu | Vegetarian Ventures
Now there’s no reason not to eat microgreens! Not only for their versatility and health benefits but also because growing them means eating local!
Feel free to let us know in the comments which variety of microgreens you’d like to grow.