Tips for making delicious baby food
You should start introducing food to your child at around 6 months. Puréed baby food is the best food for this transition and meets your baby’s nutritional needs.
To help you with this big step, we worked with nutritionist Judith Blucheau PDt and prepared this guide on how to introduce solid food to babies, how to make baby food and a few recipe ideas!
When and how to introduce food to babies?
Since breast milk covers all a baby’s nutritional needs until 6 months of age, food diversification often begins at 6 months or even 4 months for some babies.
That’s why food intake is especially important for babies because it gives them the energy and nutrients they need.
Please note
During the first year of life, breast milk or formula is the basis of a baby’s diet and food should be complementary. It shouldn’t replace breast milk or interfere with the baby’s appetite for breast milk or formula.
You’ll know your baby is ready to eat when you see them:
- Bringing items to their mouth (ex., their fingers, toys).
- Closing their mouth around a spoon (without pushing it away involuntarily).
- Showing they want to eat by opening their mouth or leaning forward.
- Not satisfied by just breast milk or formula anymore
In addition, at 6 months, babies are physically ready to eat, as they have better head control and muscle coordination.
A baby’s digestive system is also mature enough to eat other food. Increased production of saliva and digestive enzymes promotes good digestion.
It’s important not to wait until 7 months to introduce your baby to food. This can lead to nutritional deficiencies and the risk of them refusing to chew because they didn’t develop the habit earlier on.
Keep the following tips in mind when introducing your baby to food and ask your health care professional for more advice.
Iron-rich foods
Health Canada recommends that babies’ first foods be rich in iron to ensure adequate iron intake by 6 months of age.
Iron-rich foods include: enriched baby cereals, meats, fish, eggs, vegetables and legumes, nuts and tofu. To avoid nutritional deficiencies, it’s best for your baby to get iron-rich foods every day during this period.
Offer one new food at a time
It’s best to offer babies one new food at a time and to test it about 3 times.
Please note…
You don’t have to wait 3 days before introducing new veggies or fruit (which is recommended more for food allergies).
For example, you can try 1 food for 3 days to give the baby a chance to become familiar with it. During this time, check for allergies or intolerances.
Once your baby is familiar with a selection of foods and has a bit more variety in their diet, you can start mixing foods (for example, a veggie with a protein).
Portions
At this stage of a baby’s life, portions can vary from day to day. It all depends on the baby’s appetite and development. It’s important to know that each baby is unique and has their own pace of growth.
Therefore, parents are encouraged to trust their baby’s appetite and adjust the amount of food offered.
Progression of textures
Starting with smooth purées and then moving on to textured (small chunks) ones will help your baby learn to eat a variety of textures quickly.
This transition over the months will allow them to eat like the rest of the family by around 12 to 18 months.
Preparing homemade fruit and veggie baby food
Once your baby has started eating iron-rich foods, you should introduce them to vegetables and fruits quickly because they’re rich in antioxidants (vitamin C) which help their body to absorb iron, and in fibre which helps digestion and good intestinal bacteria.
Ideally, babies should eat fruits and vegetables every day at every meal.
Tip
Offer veggies at lunch or dinner, and fruit at breakfast or dessert. If your child isn’t hungry enough at mealtime, veggies and fruit can be their snacks.
Before making baby food, it’s important to always wash your hands thoroughly, not to mention clean your utensils and work area.
- Equipment
You’ll need a saucepan, hand mixer, blender or food processor (or just a fork or potato masher would work, too).
- Wash fruits and veggies
Before you start, you should wash fruits and veggies thoroughly to reduce the presence of toxins, dirt or bacteria such as salmonella sometimes found in some vegetables.
On the other hand, scrub fruits and vegetables with thick skins, such as carrots, melons, citrus fruits, with a brush. Even if the peel won’t be eaten, food should be washed well as the knife blade can contaminate the flesh when cutting.
As for the more delicate veggies and fruits, you can wash them with a sieve and discard the outer leaves of leafy greens.
Benefits of frozen fruits and veggies
Frozen fruits and vegetables are also an excellent choice as they don’t need to be washed or handled too much before use.
Plus, because they’re frozen within hours of being harvested, they contain the same amount of nutrients as fresh produce. Learn the truth about frozen vegetables here.
When buying frozen fruits and veggies, we recommend choosing those without seasoning, added salt, etc.
You can currently find frozen vegetables on the market that have been tested for pesticide residues, which means that none of the chemical pesticide molecules tested were found at a concentration above the cut-off limit.
Types of vegetables and fruits
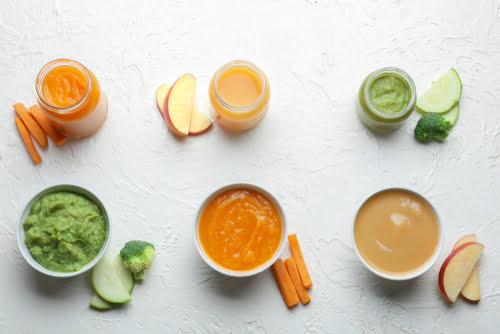
Baby can eat any veggie! Try to vary them by type and colour. Sweet potatoes, squash, zucchini, carrots, corn, parsnips, peas, broccoli, cauliflower, Brussels sprouts, asparagus, beans and beets are all great options.
Normally, your baby will prefer yellow and orange veggies because they’re sweeter and it might take a little longer to adopt green veggies, which taste more bitter.
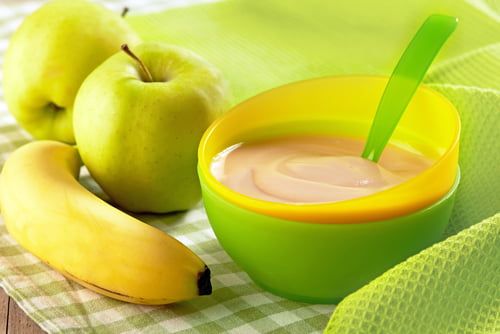
When it comes to fruits, babies can eat them all, too. Apples, pears, peaches and plums are examples of fruits that can be puréed or stewed.
Fruit such as banana, watermelon, pineapple, strawberry, raspberry, mango and avocado make excellent purées and don’t need to be cooked if they’re ripe (which make them handy for a quick snack).
Reminder
Babies don’t need fruit juice.
Preparing homemade fruit and veggie purées
Pureeing vegetables is easy and requires only 2 ingredients: a veggie and a little water. Follow these simple steps:
- Wash the vegetable well with water (with a brush if necessary) and peel if necessary.
- Cut the vegetable into pieces.
- Steam or microwave until tender. (Cooking time varies from 5 to 8 or 10 to 15 minutes depending on the vegetable. Check out our guide to microwaving.
- Mash with a fork, pestle or blender. Add a little cooking water if the purée is too thick.
Reminder
Remember that your baby will get used to the taste of the food, so you don’t need to add salt or use store-bought broths, as these also contain salt.
Pureeing fruits is easy and requires only 2 ingredients: fruit and a little water. Follow these simple steps:
- Wash the fruit well with water (with a brush if necessary), peel and remove any seeds, if necessary.
- Cut the fruit into pieces.
- Steam (or microwave) until tender. (Cooking time varies from 3-5 to 7-8 minutes, depending on the fruit. Ripe fruit doesn’t need to be cooked).
- Mash with a fork, pestle or blender. Add a little cooking water if the purée is too thick.
Reminder
To help the baby get used to the real taste of food, there’s no need to add sugar when cooking or preparing purées. They’ll taste the natural sugar in the fruit.
Storing baby food
Knowing how to store food is important for you and your family’s health. Even more so when it comes to puréed fruits and vegetables for your baby. Purees can be stored in the fridge for 2 to 3 days and in the freezer for 2 to 3 months.
- Freezing
You can prepare a larger quantity and freeze it, preferably as soon as you’ve made it.
Don’t hesitate to divide into individual portions. For example, in an ice cube tray.
Once the cubes are frozen, put them in an airtight freezer bag and label it with the name and the date you made it.
- Defrosting
Purées can be thawed in the fridge or reheated before serving.
To reheat, use a small saucepan or a double boiler on low heat, in a glass bowl placed in hot water for a few minutes, or in the microwave.
We don’t recommend refreezing a purée that’s already been thawed.
Store-bought or homemade baby food
Homemade baby food is the perfect way to feed your baby. Keep in mind that store-bought, jarred purées should be viewed as occasional convenience food.
Recipe ideas
As your baby gets used to the taste of fruits and veggies, you can offer purées with up to 3 ingredients. You can also add a small number of sweet spices and fresh herbs.
Here are some ideas for baby food recipes to get your baby off to a good start.
We hope this guide has been a great help to you in this new stage of your baby’s life. Don’t forget you can take advantage of the summer harvest to introduce your baby to purées, but they can also be made with Arctic Gardens frozen vegetables all year round 😉


